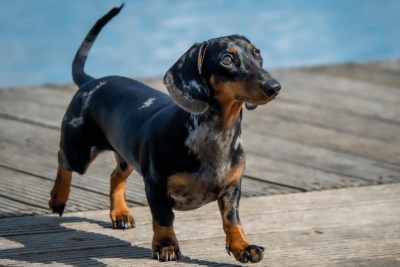
Maintaining your dog's nails goes beyond aesthetics - it's a question of health and comfort. Just as we need to cut our nails regularly, dogs also need this care to live comfortably and prevent serious complications.
Long nails may seem like just a detail, but in reality they pose several dangers. When they get too long and start to touch the ground with every step, they put continuous pressure on the animal's fingers and joints.
Over time, this can result in pain, changes in posture and even lasting changes in the way you walk.
In addition, long nails reduce the contact between the paw pads, known as pads, and the ground.
This lack of grip affects your dog's balance, leading him to slip more easily, especially on smooth surfaces.
In more serious situations, the animal's nails can bend and pierce its own paws, causing painful injuries and the risk of infection.
It's important to remember the ergot - the "extra little toe" that many dogs have on their front paws. Due to its rapid growth, this nail can become entangled in fabrics or even injure the animal's paw if it is not regularly trimmed.
What's more, sharp nails are real accidental weapons. During play or even a simple greeting, your dog can accidentally scratch you, other animals or even damage furniture and sofas.
For all these reasons, keeping your partner's nails well-trimmed should be an essential part of their grooming routine.
Signs that it's time to cut back
- Nails touching the ground (you hear a "tick-tic" when the dog walks).
- Difficulty walking on smooth surfaces or hesitation when walking.
- Nails curved or almost touching the paw pads.
- Ergôt ("extra toenail") too long - it doesn't wear off naturally!
Preparing to cut your nails
Trimming your dog's nails at home can be simple and safe, as long as you're well prepared. Gathering the right equipment and choosing the right environment makes all the difference to a smooth experience - for both you and your pet.
Materials needed
- Nail clippers specifically for dogs
*Never use human nail clippers - they don't have the right strength and shape and can hurt the animal.
- There are two main types:
- Traditional pliers (like reinforced scissors) - ideal for medium and large dogs.
- Guillotine (with sliding blade) - best for small dogs.
- Tip: Consult a vet to choose the model best suited to your pet's size.
- Dog nail file
It can be used to smooth the ends after cutting or even in place of clippers if you're afraid of cutting too much.
There are manual and electric files (rotary sanders), which wear down the nail little by little and reduce the risk of hitting the "cob" (sensitive part of the nail).
- Hemostatic powder
Essential for stopping bleeding if you accidentally cut the cob.
Found in pet shops, but wheat flour or cornstarch can be homemade alternatives in emergencies.
- Snacks and rewards
Offer treats during and after the cut to associate the moment with something positive.
This helps the dog to be calmer the next time.
- Towel or blanket (optional)
For small or agitated dogs, gently wrapping them in a towel (leaving only the paw out) can help prevent sudden movements.
- Muzzle (if necessary)
If the dog tends to bite when stressed, use a muzzle introduced in a positive way (put it on for short periods and reward before you even start cutting).
Ideal environment
Choose a quiet place with no distractions (avoid areas where people or other pets move around).
Good lighting (natural light or a directed flashlight) to see the nails well, especially in dogs with dark nails.
Choose a time when the dog is relaxed - after a walk or playtime, when he is most tired.
With everything prepared, you'll be ready to carry out the cut safely and minimize your furry friend's stress.
How to cut dog nails
The secret lies in creating a calm environment, knowing the anatomy of the canine nail and following a patient method.
1. Position the dog comfortably
Start by seating your pet safely. For small dogs, sit them on your lap or on a table covered with a non-slip mat.
If necessary, wrap it lightly in a towel, leaving only one paw out at a time.
For medium or large dogs, have them lie on their side on the floor in a quiet place. If the animal is very agitated, ask someone to help distract it with treats or cuddles while you work.
2. Get your dog used to the touch of your paws
Before you start, take a few minutes to calm your dog down. Pet it and hold its paws without rushing, rewarding it with cookies.
This daily training helps your pet associate paw handling with positive experiences. If he gets nervous, stop and try again at another time.
3. Identify the "cob" (living part of the nail)
- Clear nails: The ingrowth is visible as a pinkish area on the inside of the nail. Cut off only the translucent white part, keeping at least 2 mm away from the pink area.
- Dark nails: As the barb is not visible, cut off small portions at a time. Stop when you notice a darker or wetter spot in the center of the nail - this indicates that you are close to the sensitive part.
4. Cut at the correct angle
Position the clipper at a 45-degree angle to the nail, avoiding straight cuts. This prevents chipping and maintains the natural shape.
Hold the paw firmly (without squeezing too hard) and isolate one finger at a time, pushing the hair away to avoid accidents.
5. Cut without haste
Use a decisive movement to avoid "chewing" the nail, which can cause discomfort. For dark nails, cut thin layers and check at each stage. If the dog moves, stop and calm him down before continuing.
6. Sand the edges
After trimming, use a dog file (manual or electric) to smooth out the edges. This prevents accidental nail scratches and gives a more natural finish.
7. Reward and create a positive experience
After each paw cut, offer a treat and give lots of praise. If the dog gets too stressed, stop and resume the next day. The aim is for them to associate the process with something pleasurable.
Accidents happen! If the nail bleeds:
- Apply hemostatic powder (or wheat flour/cornstarch).
- Compress lightly with a clean cloth for 1-2 minutes.
- Comfort your pet and take a break before continuing.
Don't try to cut all the nails at once if your dog is anxious. Start with one or two a day, gradually increasing. With patience, this task will become part of the routine without trauma.
Remember: well-groomed nails prevent pain, posture problems and accidents. If you feel insecure, consult a veterinarian or specialized professional to demonstrate the technique.
Extra tips for safe cutting
- Use the curvature of the nail as a reference:
The part that curves downwards (forming a "hook") generally does not contain a cob.
Cut off only the curved end, avoiding the straighter base near the finger.
- It's better to cut less than risk it:
If in doubt, stop earlier than you think is safe. You can repeat the cut in 1 or 2 weeks - over time, the bark will recede if the nails are kept short.
- Use sandpaper for fine adjustments:
If the nail is still long after trimming, file the tips to wear them down without the risk of hitting the nail bed.
How often should you cut your dog's nails?
The ideal frequency for trimming your dog's nails depends on his size, activity level and the type of floor he lives on. Here are some general recommendations:
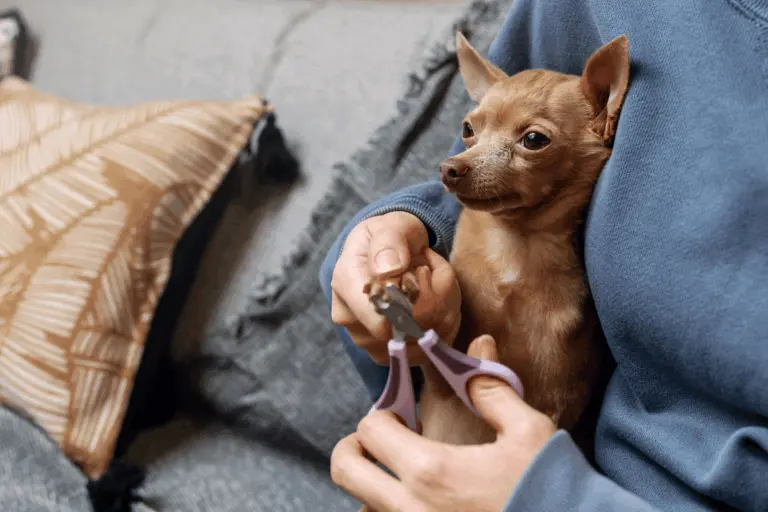
1. Small or Sedentary Dogs (Apartment Living)
The ideal cut is every 2 to 4 weeks As nails are not worn down naturally on smooth floors, they grow faster.
A good tip is to combine the cut with a fortnightly shower to create a routine.
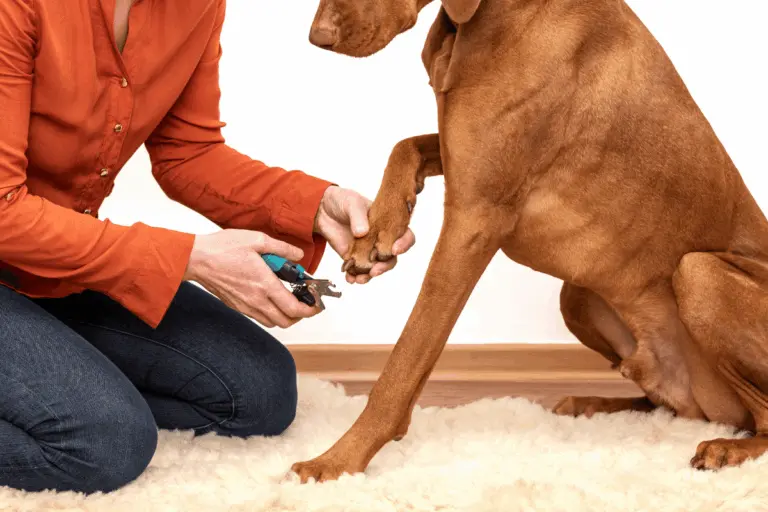
2. Medium/Large Active Dogs
For more active animals, cut every 4 to 6 weeks.
Friction with the ground helps to wear down the nails, but only if the dog is actually walking on hard surfaces (asphalt, concrete).
If your pet only walks on grass or in parks, it may need more frequent cuts.
3. Elderly dogs
For older dogs, cut every 2 to 3 weeks
As they exercise less, their nails don't wear down on their own and can become thicker.
Frequently Asked Questions
What is the right point to cut a dog's nail?
The right point is just before the cob (the live part of the nail). On light nails, cut only the white part, keeping 2 mm away from the pink area. On dark nails, cut little by little, until you notice a dark spot in the center - that's the limit.
How do I cut my dog's nails without him feeling pain?
Cut off only the dead end of the nail, without reaching the barb. Use a sharp clipper and make the cut calmly, in a quiet moment. Hold the paw carefully and always reward the pet so it feels safe.
How to cut black dog nails?
Cut very slowly and in good light. With each small cut, look at the center of the nail. If a dark or pinkish spot appears, stop. You can also use an electric file for more control. If in doubt, ask a professional for help.
How to cut the nail of an angry or frightened dog?
Train the dog gradually by touching its paws and simulating a cut. Use a muzzle if necessary and ask someone else to help. Try clipping after playtime, when the dog is calmer. Start with one nail at a time and give plenty of rewards.
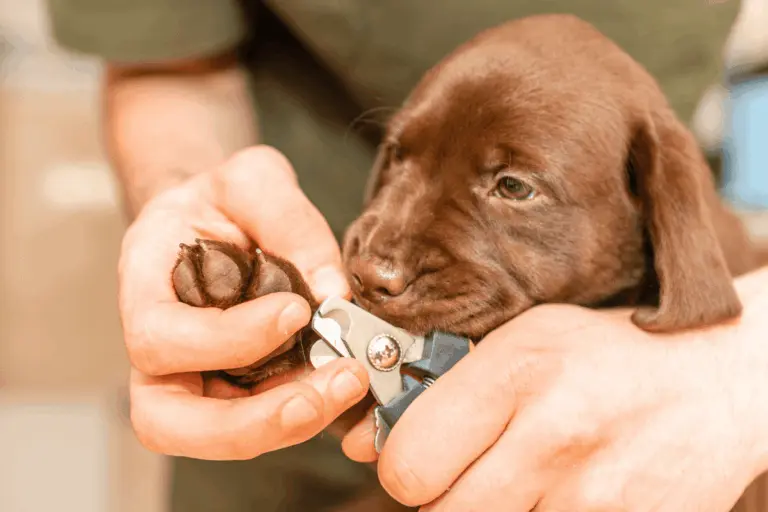
How to cut a puppy's nails?
Start early and gently. Use small clippers and cut only the tip of the nail, away from the pink part. Do it in a quiet environment and associate the moment with snacks and affection. Introduce the habit little by little.
How do I cut my dog's nails without clippers?
You can file them by hand or use an electric file suitable for pets. You can also wear down the nails by walking on rough surfaces. Avoid unsuitable tools, such as ordinary scissors. Keep up the routine until you get the right clipper.